No Bake Cookies! Perfect for the Busy Mommy.

Leave a comment

I love, love, love, LOVE no bake cookies of almost any kind!

When I’m in a rush, they are my go-to dessert.

The best part? You can make them entirely allergy free.

For your kitchen tools, all you will need is a sauce pot, a spoon for stirring, parchment paper, plastic wrap and a cookie sheet.

20131024_191835

First, add 1 cup honey, 1/2 cup coconut oil and 8 Tb unsweetened cocoa to your sauce pot.

20131024_192100

On the stove, turn the heat to medium high and bring the mixture to a boil while stirring constantly. Continue to stir as it simmers and thickens for about three minutes.

20131024_192542

Next, remove the mixture from the heat and add 1 cup peanut or other nut butter, 1 tsp vanilla, 1 1/2 to 2 cups gluten free old fashioned oats (gf quick oats will work too) and 1 cup shredded unsweetened raw coconut. I ran out of coconut, so we’ll just have to make believe we have some here. Stir well until all ingredients are mixed thoroughly.

20131024_193121

On a parchment lined cookie sheet, drop mixture by spoon fulls. Go ahead and make them whatever size you want. No bake versions break all the rules.

20131024_193231

Cover with plastic wrap if you’re a complete, nerdy clean freak like me. If not, still cover the cookies. It’s gross if you don’t.

Place the entire sheet in the freezer for 15 minutes or the fridge for at least an hour.

The rest of the instructions are listed below.

Now, if you’ll excuse me, I have some no bake cookies and a cup of green tea calling my name!

No Bake Cookies. Free of most major allergens.

  • 1 cup honey
  • 1/2 cup coconut oil (or another unrefined oil, extra light is best)
  • 8 tablespoons cocoa powder
  • 1 cup peanut butter or other nut butter
  • 1 teaspoon vanilla
  • 1 cup shredded, unsweetened coconut (preferably raw)
  • 1 1/2 to 2 cups GF old fashioned oats (You’ll know you have too many oats if mixture becomes hard to stir. For this reason, add oats gradually to desired consistency.)

Bring honey, coconut oil, and cocoa to a boil. Turn down heat and simmer for three minutes or until thickened.

Remove from heat and stir in peanut butter, vanilla, coconut, and oatmeal. Drop by small to medium spoon fulls onto a parchment lined cookie sheet. Refrigerate until set. If you really want those cookies ‘NOW’, put them in the freezer for fifteen minutes. If you have any left (HIGHLY DOUBTFUL), Store in a ziploc bag or airtight container in the refrigerator or freezer.

Happy No Baking!!!!

Simply Snacks

Leave a comment

If you’re out and about and suddenly find your tummy grumbling, allow me to suggest a few yummy snacks to keep you going until the next meal time.

I call these 'Little Squares of Happiness'. Betty Lou's Fruit Bars are very similar to Newton style cookies. But healthier and allergy free.

I call these ‘Little Squares of Happiness’. Betty Lou’s Fruit Bars are very similar to Newton style cookies. But healthier and allergy free. And they are delightfully tasty.

Nana's allergy free cookies are excellent paired with an almond milk latte. They come in the big cookie size as well as packages of little cookie 'bites'. A variety of flavors make these a fun little snack to indulge in.

Nana’s allergy free cookies are excellent paired with an almond milk latte. They come in the big cookie size as well as packages of little cookie ‘bites’. A variety of flavors make these a fun little snack to indulge in.

If you want something a little healthier than a cookie but with the same sweet satisfaction, go for a Lara Bar! These little packages are super satisfying. They even come in a decadent 'Jocolat' collection, offering flavors such as mint chocolate and chocolate coffee. Don't forget to try their 'Uber' style bars as well, which are made from whole nuts and fruits.

If you want something a little healthier than a cookie but with the same sweet satisfaction, go for a Lara Bar! These little packages are super satisfying. They even come in a decadent ‘Jocolat’ collection, offering flavors such as mint chocolate and chocolate coffee. Don’t forget to try their ‘Uber’ style bars as well, which are made from whole nuts and fruits.

It goes without saying that anything from Enjoy Life is a sure to satisfy snack. They offer everything from snack bars to cookies to lip smacking chocolate bars , all free of the major allergens.

It goes without saying that anything from Enjoy Life is a sure to satisfy snack. They offer everything from snack bars to cookies to lip smacking chocolate bars, all free of the major allergens.

If something salty is what you're craving, Glutino brand offers a variety of crackers, pretzles and bagel chips. While primarily gluten free, I have found some of their products are free of dairy and eggs as well.

If something salty is what you’re craving, Glutino brand offers a variety of crackers, pretzles and bagel chips. While primarily gluten free, I have found some of their products are free of dairy and eggs as well.

I’ll just bet that some of you are now coming up with an excuse to be ‘out and about’ today, just so you can get your hands on one of these snacks!

Well, at least I am anyway! Now where are my keys…..?


Happy Snacking!

Peanut Butter Cookies: Three Different Delicious Ways to Make Them!

Leave a comment

pb resize

Who here does not LOVE peanut butter cookies?

You DON’T? And you’re not allergic to peanuts?!?

I cannot even comprehend.

For the rest of us with normal taste buds, today’s post is a festival of peanut butter cookie goodness.

I could eat them every day.

But I don’t. Because I don’t want to be a Fatty Two By Four.

Shall we begin?

Vegan Three Ingredient Peanut Butter Cookies

  • 1/4 cup plain, unsweetened applesauce
  • 3/4 cup sugar (your choice here: coconut, date, turbinado, or the white cancerous kind…)
  • 1 cup peanut butter (I use Adam’s. Please, don’t use peanut butter flavored shortening here….otherwise known as Skippy or Jif. Yuck.)

Preheat oven to 350 degrees.

Combine all three ingredients with a mixer.

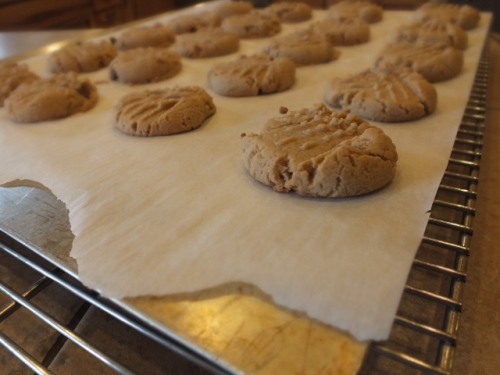
Once ingredients are combined, shape dough into small balls and place on an ungreased (or better yet, parchment paper lined) cookie sheet or stone. Criss cross each cookie ball with a fork.

Bake for ten minutes (or until golden, so they may need to bake a little longer depending on your oven).

Remove from oven and let sheet sit on a cooling rack for ten minutes before transferring cookies to another cooling rack.

Now for recipe number two! Identical to the first recipe except for one ingredient. Yes, you’ll notice I did copy and paste from the last recipe. I have things to do! Like eat peanut butter cookies.

Three Ingredient Gluten/Dairy Free Peanut Butter Cookies

  • 1 chicken or duck egg
  • 3/4 cup sugar (your choice here: coconut, date, turbinado, or the white cancerous kind…)
  • 1 cup peanut butter (I use Adam’s. Please, don’t use peanut butter flavored shortening here….otherwise known as Skippy or Jif. Yuck.)

Preheat oven to 350 degrees.

Combine all three ingredients with a mixer.

Once ingredients are combined, shape dough into small balls and place on an ungreased (or better yet, parchment paper lined) cookie sheet or stone. Criss cross each cookie ball with a fork.

Bake for ten minutes (or until golden, so they may need to bake a little longer depending on your oven).

Remove from oven and let sheet sit on a cooling rack for ten minutes before transferring cookies to another cooling rack.

And now for the more traditional peanut butter cookie, only without the allergens or Crisco like the ones Mom used to make. (You know what I’m talking about if you’re a child of the eighties or older. You probably also drank Tab. And ate copious amounts of Doritos. Which is why you are here because now you have food allergies or sensitivities.)

Allergy Free Peanut Butter Cookies

  • 1/2 cup Earth Balance spread
  • 3/4 cup natural peanut butter (Such as Adam’s)
  • 1 cup firmly packed light brown sugar (coconut sugar works well here too)
  • 1 Tb gluten free vanilla
  • 1 chicken/duck egg OR 1 Tb ground flaxseed and 3 Tb water
  • 1 3/4 cups gluten free flour
  • 1/2 tsp salt 
  • 3/4 tsp baking soda
  • (Optional) 1/2 cup Enjoy Life mini chocolate chips

Preheat oven to 375 degrees. 

In a medium mixing bowl, combine Earth Balance, peanut butter, sugar, vanilla and egg or replacer. Beat until thoroughly creamed together. 

Next add the dry ingredients: Gluten free flour, salt and soda. Blend until completely combined, being sure to mix in any dry ingredients from the bottom of the bowl.

If desired, add the chocolate chips.

Roll dough into 1 inch balls and place 2 inches apart on an ungreased or parchment lined cookie sheet. Criss cross each ball with a fork. 

Bake cookies for 10 minutes or until edges are golden and cookies are set.

Remove from oven and let sheet cool on a wire rack for at least ten minutes before transferring cookies to another cooling rack.

While cookies are cooling, make a nice pot of coffee or heat up a mug of chocolate almond milk to wash them down with.


Happy Being Nutty!

Snowballs! Minus the Snow.

1 Comment

Snowballs have long been one of my favorite Christmas cookies.

So I made them allergy free.

And now I will share the recipe with you!

Snowball Cookies

First, cream together 1 cup powdered sugar, 2 cups (yes, I said 2 cups) Earth Balance and 3 tsp vanilla.

First, cream together 1 cup powdered sugar, 2 cups (yes, I said 2 cups) Earth Balance and 3 tsp vanilla.

Next, add 2 cups GF flour and 1/2 tsp salt. Blend well, then add another 2 cups GF flour. Blend.

Next, add 2 cups GF flour and 1/2 tsp salt. Blend well, then add another 2 cups GF flour. Blend.

Your mixture will resemble coarse crumbs. That's exactly how you want it to look.

Your mixture will resemble coarse crumbs. That’s exactly how you want it to look.

Next, add 1/4 cup almond milk (or your choice milk) and blend. Your dough will still resemble coarse crumbs, but you should be able to grab a small handful and press it together, like so.

Next, add 1/4 cup almond milk (or your choice milk) and blend. Your dough will still resemble coarse crumbs, but you should be able to grab a small handful and press it together, like so.

The next step is to form the snowballs. You won't be able to roll them like you would a snickerdoodle: they'll fall apart that way. Instead, simply take a bit of dough and form them much like you would a, well, snowball! Then place them on a cookie sheet.

The next step is to form the snowballs. You won’t be able to roll them between your palms like you would a snickerdoodle: they’ll fall apart that way. Instead, simply take a bit of dough and form them much like you would a, well, snowball! Then place them on an ungreased cookie sheet. Put them in a 325 degree oven for 17 minutes. Do not over bake.

When the time is up, remove the cookies from the oven and let the sheet sit on a cooling rack for about two minutes. Using a small spatula, place one or two cookies at a time into a bowl of powdered sugar. Roll with the spoon until sugar coats the cookie, then transfer to a cooling rack.

When the time is up, remove the cookies from the oven and let the sheet sit on a cooling rack for about two minutes. Using a small spatula, place one or two cookies at a time into a bowl of powdered sugar. Roll with the spoon until sugar coats the cookie, then transfer to a cooling rack.

Once cooled, enjoy these little spheres of joy with a cup of coffee or tea!

Once cooled, enjoy these little spheres of joy with a cup of coffee or tea!

Snowball Cookies: No gluten, dairy, eggs, soy

  • 1 cup powdered sugar
  • 2 cups Earth Balance
  • 3 tsp vanilla
  • 4 cups GF flour
  • 1/2 tsp salt
  • 1/4 cup almond or other milk
  • Additional powdered sugar for coating

Preheat oven to 325.

First, cream together 1 cup powdered sugar, 2 cups (yes, I said 2 cups) Earth Balance and 3 tsp vanilla.

Next, add 2 cups GF flour and 1/2 tsp salt. Blend well, then add another 2 cups GF flour. Blend. Your mixture will resemble coarse crumbs. That’s exactly how you want it to look. Next, add 1/4 cup almond milk (or your choice milk) and blend. Your dough will still resemble coarse crumbs, but you should be able to grab a small handful and press it together.

The next step is to form the snowballs. You won’t be able to roll them between your palms like you would a snickerdoodle: they’ll fall apart that way. Instead, simply take a bit of dough and form them much like you would a, well, snowball! Then place them on an ungreased cookie sheet. Put them in a 325 degree oven for 17 minutes. Do not over bake.

When the time is up, remove the cookies from the oven and let the sheet sit on a cooling rack for about two minutes. Using a small spatula, place one or two cookies at a time into a bowl of powdered sugar. Roll with the spoon until sugar coats the cookie, then transfer to a cooling rack.

Makes about 4 dozen.

Then go indulge and impress others with your allergy free baking skills!

Happy Playing in the Snow!

Espresso Peppermint Mocha Crinkles

Leave a comment

pep choc crinkles

This, my friends, is what Christmas tastes like.

WARNING! Before you make these, you may want to purchase the Insanity or Jillian Michaels workout videos. Because you’re going to eat them all. You won’t be able to stop! They are so devastatingly delicious.

Espresso Peppermint Mocha Cookies
  • 2 cups GF flour 
  • 2 teaspoons baking powder
  • ½ teaspoon salt
  • 1 cup (yes, you read that right) baker’s cocoa powder (such as Hershey’s)
  • 2/3 cup white sugar 
  • ¼ cup brown sugar
  • ½ cup vegetable oil (I used extra light olive oil)
  • 1.5  Tablespoons espresso powder, ground super fine in a coffee grinder 
  • 4  eggs OR the equivelent in egg replacer
  • 1 teaspoon pure vanilla extract
  • 1/4 to 1/2  teaspoon peppermint extract (Amount is depending on how ‘pepperminty’ you like it – the smaller amount will give a hint of peppermint while the full amount will definitely make the peppermint take center stage. Do not double your extract if you double the recipe or it will be too overpowering.)
  • ¼ cup powdered sugar (for rolling the cookies)

Combine all of your wet ingredients and blend with a stand or hand mixer. Next, blend together your dry ingredients in a separate bowl and then add to wet ingredients. Blend until mixed well and ingredients form a dough.

If using GF flour, you may notice that the mixture is a bit dry. Mine was, so I gradually added small amounts of  unsweetened almond milk until I felt it was the right consistency of cookie dough. Not too dry or wet but tacky to the touch.

Optional: Cover the bowl with plastic wrap and allow the dough to chill in the refrigerator for at least 4 hours. I did not do this. I wanted to get at these cookies!
When you are ready to bake your cookies, preheat the oven to 350 degrees Fahrenheit. Line a baking sheet with parchment paper. (Do this step if you can. It’s a great kitchen tool!)
Roll the dough into 1 Tablespoon sized balls. Dip half of the dough ball into the powdered sugar, then place the ball onto the prepared cookie sheet, powdered sugar-side up. Place the dough balls at least 1 inch apart on the cookie sheet. When you have filled a cookie sheet, very lightly and gently press down on each ball, slightly flattening it.
Bake the cookies on the center rack of the oven for 8-9 minutes, until the cookies begin to crack on top, and the visible insides of the cookies appear gooey.  Do not over bake the cookies, as they will become dry and crumbly.  Let cookies cool on sheet for a few minutes before transferring to wire rack. 
And proceed to eat the entire batch. Not really. Yes, really. Really.
Happy Delicious Days!

Pack a Little Happiness – Lunchbox Bars

2 Comments

It is that time of the year again: The leaves are turning, the footballs are flying and we mommies are wondering what to put in our allergy ridden child’s lunchbox.

Buying store bought goodies is expensive and usually means we are giving our kiddos not only sugar but bunches of preservatives as well.

Which is why I have my go-to lunchbox bars on hand often. They are easy to prepare, versatile for various food allergies and they also freeze well. Of course, with two almost seventeen year old men children in the house, they never quite make it to the freezer. Or to the cooling rack for that matter.

A warning, though: These bars are so scrumpdillyumptious you will have a hard time not sneaking ‘just one more little, bitty square’. Until you realize you have ‘itty bitty squared’ yourself into about four entire bars. They’re that good.

And now that you’ve been thoroughly warned, here is the recipe. (Remember, all of my recipes can be converted to traditional ingredients.)

Oat or Quinoa Chocolate Chip Lunchbox Bars

  • 1 ½ cups firmly packed brown sugar
  • (Update: I failed to mention that I only use I cup of brown sugar in this recipe as that amount makes it plenty sweet. However, if you are a sugar miser, go ahead and use the full amount. 😉  You can also use other alternative sugars, such as coconut or date.)
  • 1 cup shortening or butter or Earth Balance
  • 2 Tb. molasses
  • 2 tsp. vanilla
  • 2 eggs (if using duck eggs, only 1or 1 Tb prepared egg replacer or 4 Tb plain applesauce
  • 1 cup GF flour mix (or all purpose flour)
  • 1 tsp. baking soda
  • 1 tsp. salt
  • 3 cups GF oats or quinoa flakes
  • ½ to 1 cup chocolate chips (Enjoy Life, Guittard or Ghirardelli – check ingredients)

Pre-heat oven to 350.  Cream together brown sugar and ‘butter’.  Add eggs or replacer, molasses and vanilla.  Blend well.  Add all dry ingredients except for oats/quinoa and chocolate chips.  Blend well.  Blend in oats or quinoa.  Stir in chocolate chips.  *If batter is dry, add a little dairy free or regular milk or liquid of your choice.

Spread in greased 9×13 pan.  Bake for 25 to 30 minutes until edges are brown and center is set.  Cool for at least 20 minutes before cutting into bars

Recipe copywritten by The Freak Food Gourmet, Jaime Rohm 2007

Happy Eating Cookies Until Your Buttons Pop!

Peanut Butter Cookies – Without the Worries

3 Comments

Unless you’re allergic to peanuts, that is.

Then you’ll need to worry.

Or just substitute a different kind of nut butter.

No worries. You can eat these.

Peanut Butter Oatmeal (or quinoa) Cookies: No egg, dairy, gluten, sugar or soy

  • 1/2 cup butter (1 stick), softened *OR* 1/3 cup Earth Balance Spread
  • 1/3 cup agave nectar or 1/2 cup honey (I recommend the honey)
  • 1 egg or 3 TB applesauce (I don’t recommend commercial egg replacers for this recipe. It makes the cookies too dry.)
  • 1 teaspoon vanilla extract
  • 1 cup peanut butter (I used and recommend Adams)
  • 1 1/4 cup GF flour
  • 1/2 cup old fashioned oats or 1/3 cup quinoa flakes
  • 1 teaspoon baking soda
  • 1/2 teaspoon salt

First, beat together all of your ‘wet’ ingredients: honey, Earth Balance, ‘egg’, vanilla and peanut butter. Next, add the flour, soda and salt. Then beat in the oats or quinoa. If your dough seems a little dry, add a few drops of almond or other milk to get it to ‘just moist’. You don’t want the dough to be wet.

(You’ll notice in the photos that there seem to be A LOT of oats! That’s because the original recipe – before I got to it and changed it all up – called for an insane amount of oats. I won’t do that to you, my friend.)

 Scoop by tablespoonfuls onto an ungreased stone or baking sheet. Criss cross the dough balls with a fork.

Bake at 350 degrees for 10 to 12 minutes or until edges are barely golden. Remove from oven and let cool for at least five minutes before transferring cookies to a wire rack. Allow to cool almost entirely or entirely before eating, as gluten free cookies tend to be crumbly when hot.

Make yourself a cup of coffee and take five with these yummy cookies.

Oh, and if you’re a sugar aholic, you probably will notice these aren’t as sweet as you would expect. Which is good, because you actually taste the ingredients and not the sweeteners. Even better!

Happy Cookie Breaks!

Toll House Cookies – Allergy Free Style

2 Comments

Just because you have allergies to certain foods does not necessarily mean you can never again eat your favorite recipes.

The following recipe is from the original, with changes added by me.

Our family doesn’t even notice the difference.

So yummy and gooey and chocolately and …. well, let’s just get started, shall we?

I apologize that there are no pictures. But I think y’all know how to make cookies. I’ll take some and insert them the next time we prepare them.

Allergy Free Toll House Cookies

2 1/4 cups all purpose gluten free flour mix (see recipe link at top of blog)

*If you live in a very dry climate, you may need to reduce the flour to 2 cups*

1 tsp baking soda

1 tsp salt

3/4 cup Earth Balance spread *OR*1 cup softened butter

1/2 cup brown sugar

1/2 cup granulated sugar

*OR* substitute the above sugars with 3/4 cup agave

1 tsp vanilla extract (gf)

Egg replacer equivalent of 2 eggs *OR* 2 eggs *OR* 6 Tb plain applesauce

1 cup Enjoy Life miniature chocolate chips or your choice of chips

Preheat oven to 375.

In a large bowl, cream together Earth Balance and sweeteners. Add your egg replacer and vanilla and blend well. Next, add the flour, soda and salt. Blend well. Stir in the chocolate chips. Scoop with a small cookie scoop onto an ungreased cookie sheet or baking stone.

Bake for 9-12 minutes, or until edges are golden. Remove from oven and let cool for five minutes before transferring to a cooling rack. It is best to let these cookies cool for a bit before eating as they can be crumbly when warm. When they cool, they are delightful.

Here are the links to the spread, egg replacer and chocolate chips:

Earth Balance

Ener-G Egg Replacer

Enjoy Life Chocolate Chips

Happy Getting Your Chocolate Fix!